
Overview
Before diving into the fun stuff like penetration testing tools and vulnerable machines, we need a secure, segmented network foundation to build on. We’ll be using pfSense (an open-source firewall and router platform) throughout this series to properly segment our cybersecurity lab. In this tutorial, we’ll install pfSense CE (the free community edition) and configure it with multiple network interfaces to create isolated lab segments for different purposes – similar to what you’d see in enterprise environments.
What You’ll Learn:
- pfSense installation and initial configuration
- Multi-interface network design for lab segmentation
- Interface assignment and IP addressing through the Netgate installer
- Virtual network design for a segmented lab
Estimated Time: 30-45 minutes
Difficulty Level: Intermediate
Prerequisites
Before You Begin:
- VMware Workstation Pro installed and configured
- At least 16GB RAM available for your lab
- 100GB disk space for pfSense and initial VMs
- Basic understanding of networking concepts (IP addresses, subnets)
💻 Hardware check: Not sure if your machine is ready for this stage? See Hardware Check for full specs and what you can run at each point in the series.
System Requirements for the pfSense VM:
- CPU: 2 cores (recommended)
- RAM: 1GB minimum (2GB recommended)
- Disk: 20GB
- Network Adapters: 6 (1 WAN + 5 for lab segments)
Part 1: Downloading pfSense
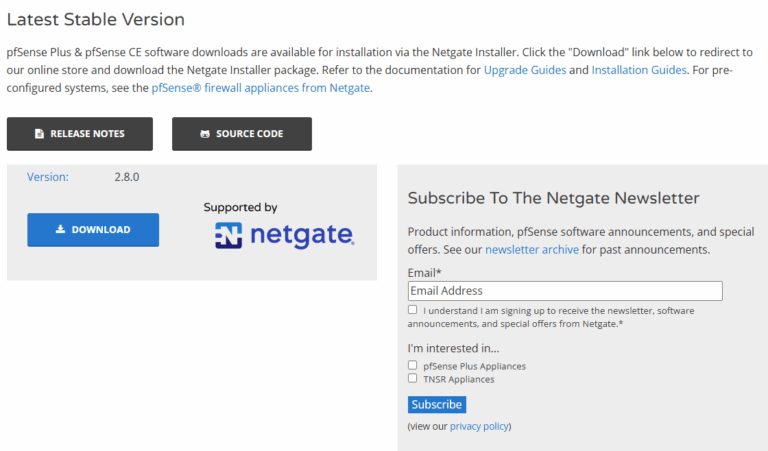
For this tutorial, we’re downloading pfSense CE. Head over to https://www.pfsense.org/download/
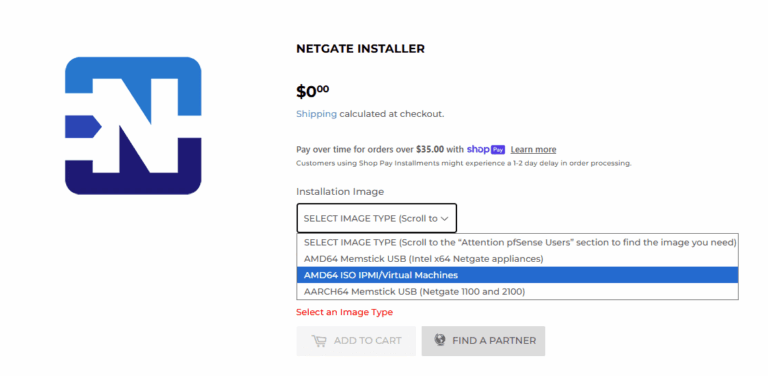
- Click DOWNLOAD. You’ll be directed to the Netgate Installer page.
- From the Installation Image dropdown, select AMD64 ISO IPMI/Virtual Machines, then click ADD TO CART.
- Click ENTER CART or the cart icon in the top-right corner. (Don’t worry – it’s free.)
💡 First time here? Netgate requires a free account to complete the download. If you don’t have one, you’ll be prompted to create one before checkout. Fill in your first name, last name, email, and a password, then click CREATE. If you already have an account, just sign in.
- In the Shopping Cart, confirm the item shows Netgate Installer – AMD64 ISO IPMI/Virtual Machines at $0.00, then click CHECKOUT.
- Complete the checkout process. No payment information is required – just your name, address, and email. Click through to confirm your order.
- On the confirmation page, click Download Now next to the
netgate-installer-v1.1.1-RELEASE-amd64.iso.gzfile. You’ll also receive a download link by email.
💡 The file downloads as a .iso.gz compressed archive – you’ll need to extract it before VMware can use it.
Windows: Right-click the file and use 7-Zip or WinRAR to extract it.
Mac/Linux: Double-click the file, or run the following in Terminal: gunzip netgate-installer-v1.1.1-RELEASE-amd64.iso.gz
Once extracted, you’ll have a standard .iso file ready to go. The ISO is typically 500-700MB.
Optional: Verify the SHA256 checksum
If you want to confirm the file downloaded cleanly, run the appropriate command below and compare the output to the checksum listed on the Netgate download page. Match = good. No match = re-download.
- Navigate to the folder containing the extracted ISO file.
- Right-click the folder and select Open in Terminal.
- Run the command for your OS and compare the output to the checksum on the Netgate download page:
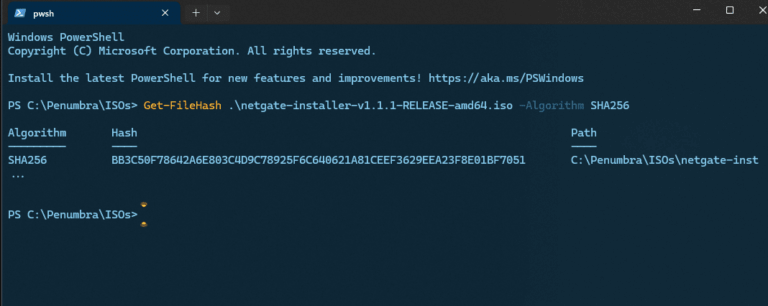
Windows (PowerShell): Get-FileHash .\netgate-installer-v1.1.1-RELEASE-amd64.iso -Algorithm SHA256
Linux/Mac (Terminal): sha256sum netgate-installer-v1.1.1-RELEASE-amd64.iso
Windows (terminal output example):
Part 2: Creating the pfSense Virtual Machine
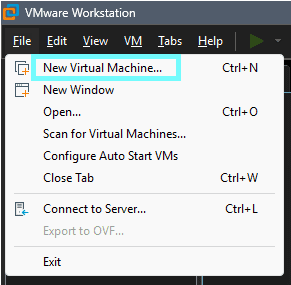
- In VMware Workstation, click File > New Virtual Machine.
- Select Typical configuration and click Next.
- Select Installer disc image file (ISO), click Browse, locate your extracted pfSense ISO, and click Next.
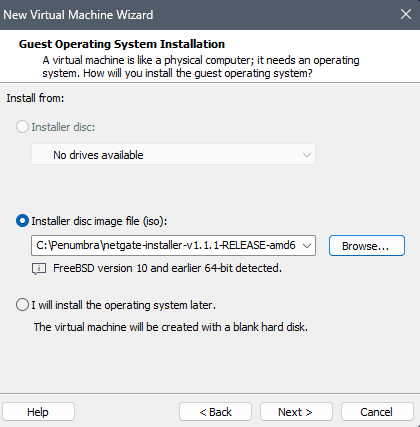
💡 VMware may display “Could not detect which operating system is in this disc image.” pfSense isn’t in VMware’s OS library so this is expected behavior. You can keep going.
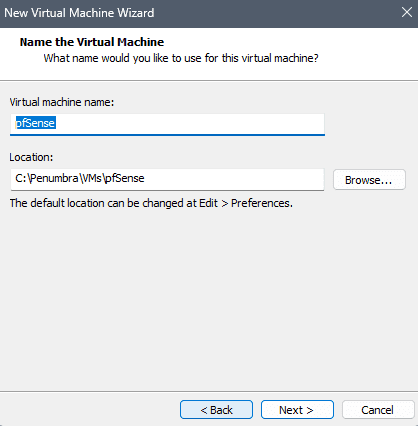
- Set the Virtual machine name to
pfSense(or whatever makes sense to you), choose a Location with sufficient disk space, and click Next.
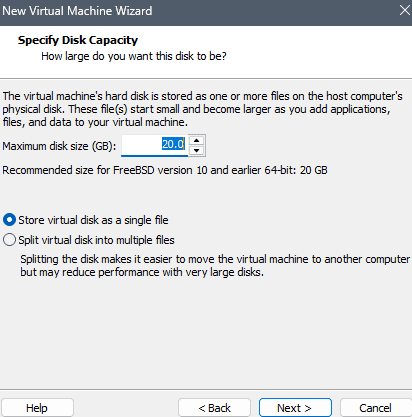
- Set Maximum disk size to 20 GB, select Store virtual disk as a single file for better performance, and click Next.
- Review the summary but don’t start the VM yet. Click Customize Hardware to configure the hardware before finishing.
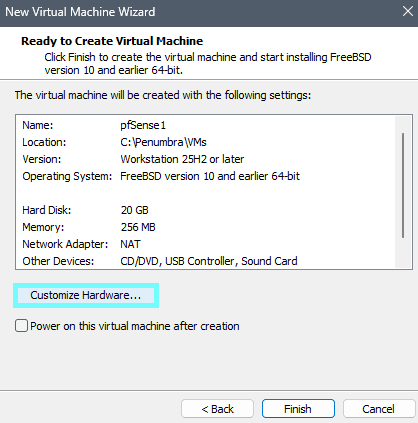
❗ Don’t click Finish yet. You need to configure memory, processors, and network adapters before the VM is usable. Do it now while you’re already in hardware settings, it’s much easier than going back in later.
- Select Memory from the left panel and set it to 2048 MB (2GB).

💡 pfSense can technically run on 1GB, but 2GB gives it comfortable headroom when routing traffic across multiple network segments simultaneously. When in doubt, be generous with RAM.
- Select Processors, set Number of processors to 1, and Number of cores per processor to 2.
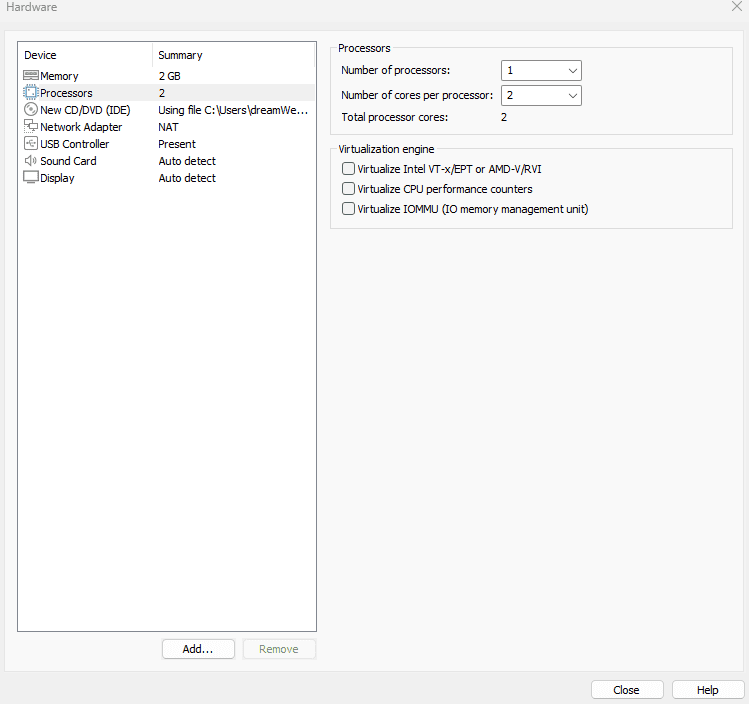
💡 Leave all Virtualization engine options unchecked. These enable nested virtualization and advanced hardware features that pfSense doesn’t need. Enabling them adds overhead without any benefit.
- Click on Network Adapter and configure the WAN interface:
- Network connection: Select Bridged
- Check Replicate physical network connection state
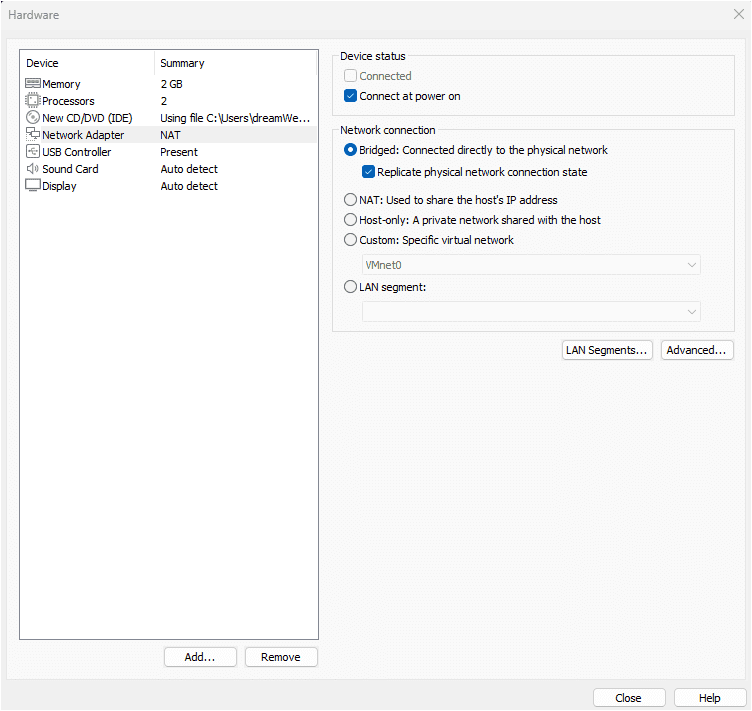
💡 Quick note for anyone about to disappear down a rabbit hole on Bridged vs. NAT: Use Bridged. For this lab, it’s the right call. Bridged gives pfSense a real IP address from your home router, which is exactly how a real firewall operates. NAT adds a translation layer you don’t need here. This isn’t a permanent decision. If you ever need to change it, it’s a thirty-second fix in VM settings. For this lab you’ll pick Bridged, take a breath, and keep moving.
💡 Also: Keep Connect at power on checked. If it’s unchecked, pfSense boots with no network connectivity and you’ll have to manually connect adapters every time which defeats the entire purpose of a firewall that’s supposed to be routing traffic from the moment it starts.
- Click Add…, select Network Adapter, and click Finish. Repeat this process until you have a total of 6 network adapters (the original WAN adapter plus 5 new ones).
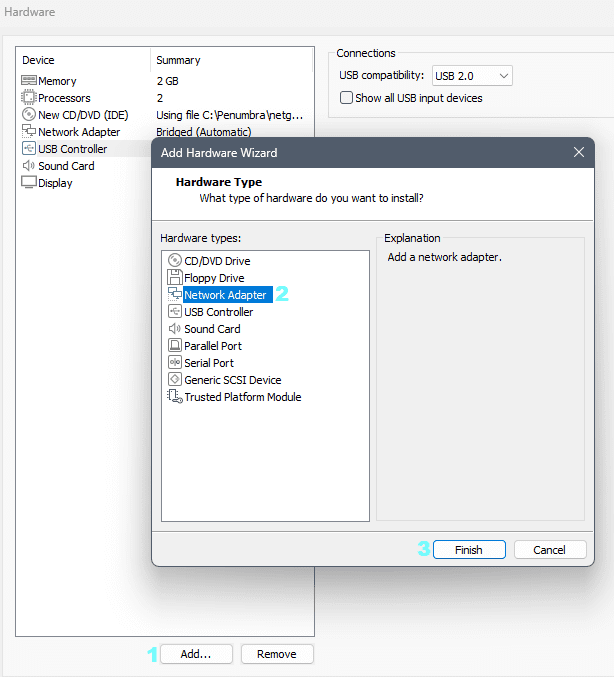
💡 If you’re following this series, you already know your lab layout. Add all 6 adapters now if you know your lab layout, it will save you from reconfiguring pfSense every time you add a new segment. We’re adding all 6 upfront: 1 WAN + 5 lab segments.
- Select Network Adapter 2 and configure it as your LAN interface:
- Network connection: Select Custom: Specific virtual network
- Select VMnet2
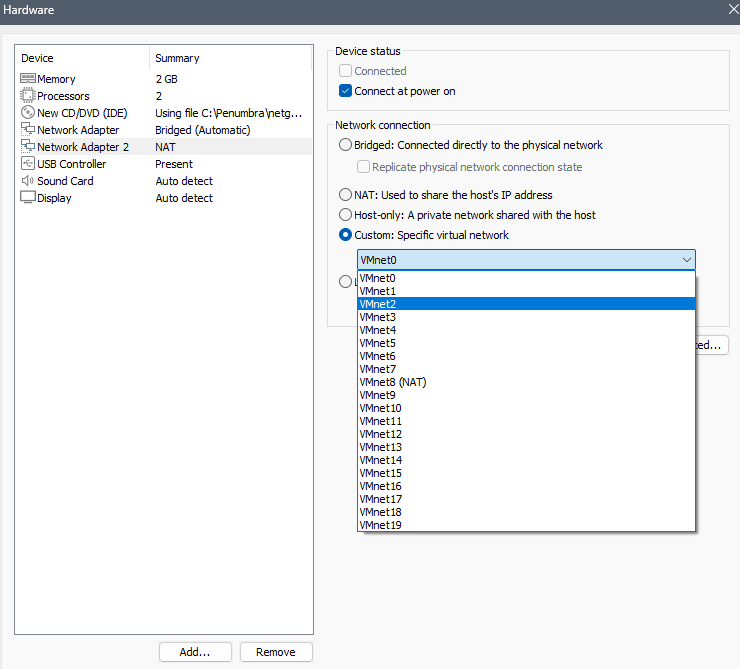
💡 Why VMnet2? VMware’s built-in networks are already claimed: VMnet0 = Bridged, VMnet1 = Host-only, VMnet8 = NAT. VMnet2 and above are open for custom use, which is exactly what we want.
Custom virtual network vs. LAN Segment – always pick Custom. Custom: Specific virtual network gives each adapter its own isolated VMnet that pfSense controls. LAN Segment bypasses pfSense entirely, which allows VMs on the same LAN Segment to talk to each other directly, but pfSense can’t see or control any of that traffic. For a security lab where pfSense is the whole point, Custom is the right choice here.
- Configure the remaining four adapters as follows:
| Adapter | Purpose | VMnet Assignment |
|---|---|---|
| Network Adapter 3 | DMZ1 (Isolated Lab 1) | VMnet3 |
| Network Adapter 4 | DMZ2 (Isolated Lab 2) | VMnet4 |
| Network Adapter 5 | CORP (Corporate Simulation) | VMnet5 |
| Network Adapter 6 | SPAN (Monitoring) | VMnet6 |
For each: select the adapter, choose Custom: Specific virtual network, and assign the appropriate VMnet.
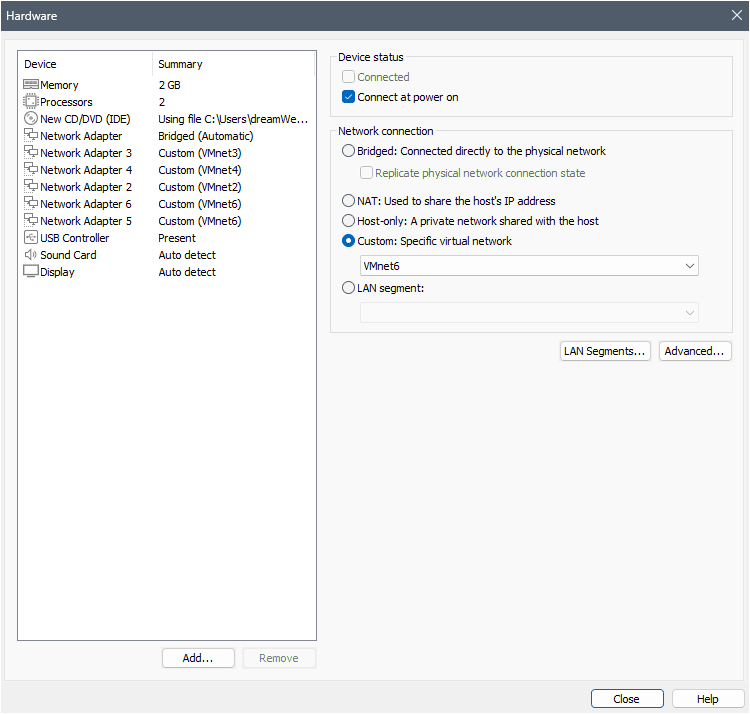
- Remove hardware pfSense doesn’t need:
- Select USB Controller and click Remove
- Select Sound Card and click Remove
Click Close, then Finish to create the VM.
💡 Before you power it on, take a second to verify that all 6 network adapters appear in the VM summary and are assigned to the correct VMnets. Much easier to catch a misconfiguration now than from inside the installer.
Part 3: Installing pfSense
- Start the pfSense VM. You’ll see the pfSense boot menu. Wait for the automatic boot, or press Enter to proceed immediately. The system will load and launch the Netgate Installer.
- WAN Interface Assignment: The installer presents a graphical interface selection screen.

em0should be highlighted by default – this is your first network adapter (Bridged/WAN)- Confirm
em0is selected and click OK
💡 Understanding interface names:
em0 = First adapter (WAN – bridged to your home network)
em1 = Second adapter (LAN – VMnet2)
em2 through em5 = Additional lab segments (DMZ1, DMZ2, CORP, SPAN)
- WAN Network Mode Setup: The defaults are correct for this lab. Click OK to proceed without changes.
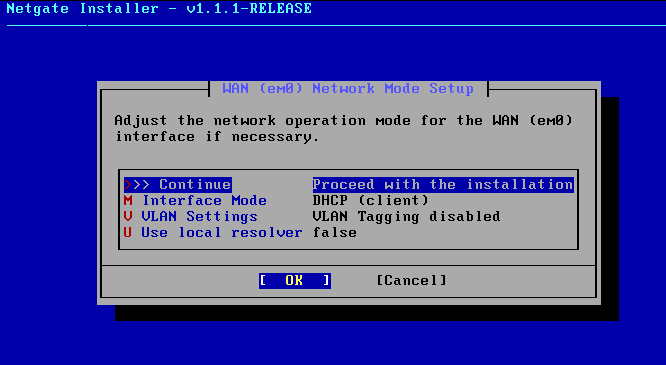
- Interface Mode: DHCP (client) 🗸
- VLAN Settings: VLAN Tagging disabled 🗸
- Use local resolver: false 🗸
- LAN Interface Assignment: Select
em1, then click OK.
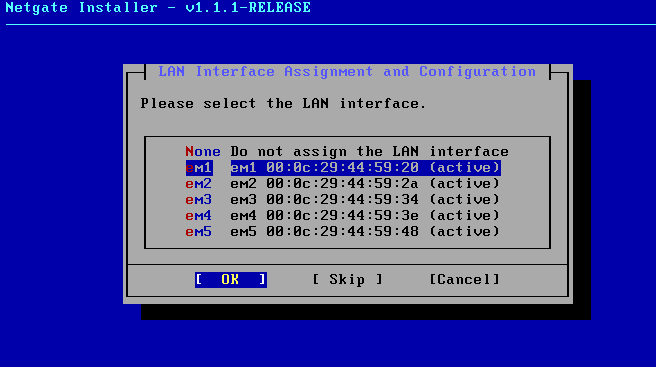
❗ Don’t leave this as “none.” The installer defaults to none / Do not assign the LAN interface. Scroll down, select em1, and then click OK. Skipping this means pfSense boots with no LAN and nothing on your lab network will be able to reach the web interface.
💡 Kali isn’t installed yet, and that’s fine. Assigning the LAN interface now doesn’t require anything to be connected to it. You’re just telling pfSense which adapter will serve as LAN. Kali joins that network in the next tutorial.
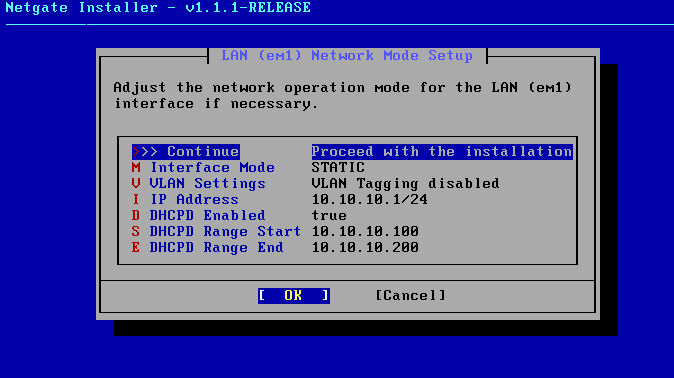
- LAN Network Mode Setup: Do not click OK with the default values. The installer pre-fills 192.168.1.x addresses, which conflict with many home networks.

Change the following three values:
- Select I: IP Address and change to
10.10.10.1/24 - Select S: DHCP Range Start and change to
10.10.10.100 - Select E: DHCP Range End and change to
10.10.10.200
Your completed settings should show:
- IP Address:
10.10.10.1/24 - DHCPD Enabled: true
- DHCP Range Start:
10.10.10.100 - DHCP Range End:
10.10.10.200
💡 What this gives you:
10.10.10.1-99: available for static assignments
10.10.10.100-200: DHCP pool (101 addresses)
10.10.10.201-254: reserved for future static assignments
Select >> Continue and click OK.
- Interface Assignment Confirmation: Review the summary and click Continue.
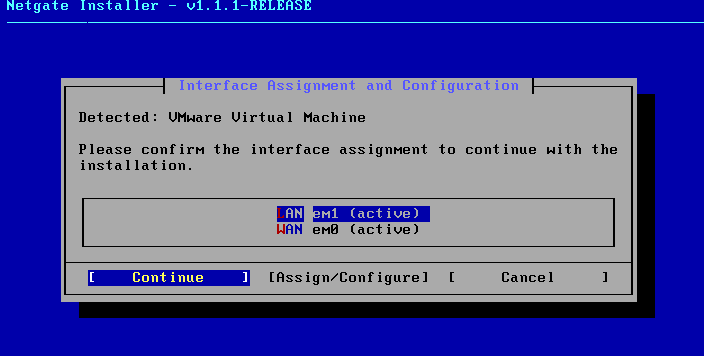
The installer displays your assignments:
LAN  em1 (active)
WAN  em0 (active)
💡 Only WAN and LAN appear here and that’s normal. Your remaining four adapters (em2-em5) for DMZ1, DMZ2, CORP, and SPAN will be configured through the pfSense web interface in Tutorial 4.
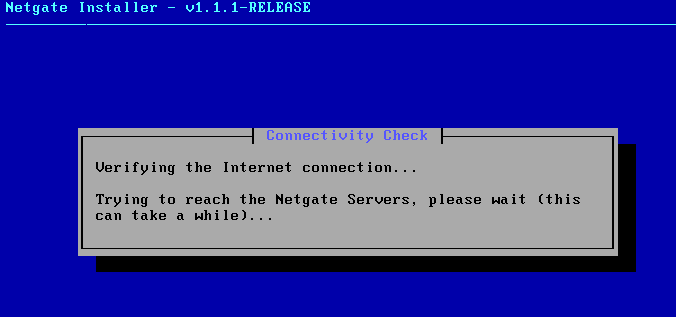
- Connectivity Check: The installer verifies your internet connection and attempts to reach the Netgate servers. This may take a moment. Just let it run.
- Active Subscription Validation: The installer checks for a pfSense Plus subscription. Since we’re installing the free Community Edition, you’ll see a message stating this device does not have an active pfSense Plus subscription.
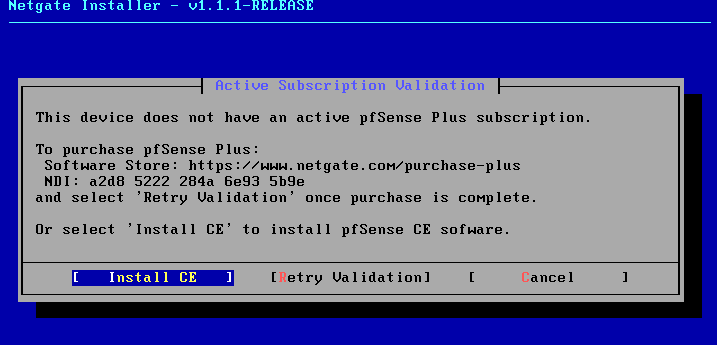
💡 Mo worries, this isn’t an error. pfSense Plus is a paid commercial product. pfSense CE is the free community edition we’re installing in this tutorial and it’s everything you’ll need for this lab. You’re not missing out on anything.
Click Install CE to proceed.
- Installation Options: The defaults are correct. Click OK to proceed.
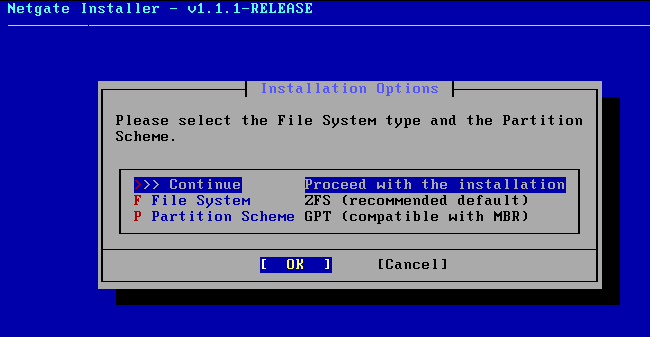
- File System: ZFS 🗸
- Partition Scheme: GPT 🗸
💡 Why ZFS? Better data integrity, snapshot support, and self-healing capabilities. It’s the right default for a lab environment – you can leave it and move on.
- ZFS Virtual Device Type: Stripe – No Redundancy is already selected. Click OK.
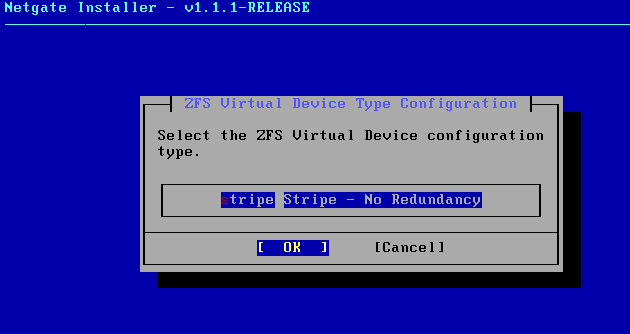
💡 “No Redundancy” sounds alarming – but it isn’t. Stripe is the correct choice for a single virtual disk. Redundancy options require multiple physical disks, which isn’t relevant here. In a VM, snapshots and backups handle that role.
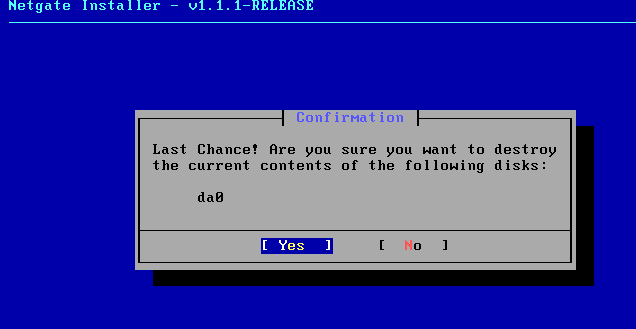
- Disk Selection: Your 20GB virtual disk is already selected. Click OK.

- 🗸 da0 20G <VMware, VMware Virtual S>
⚠️ This will erase the disk. In a VM, that’s expected and fine. Just worth noting if you ever run through this process on physical hardware.
- Software Version to Install: Select Current Stable Version and click OK.
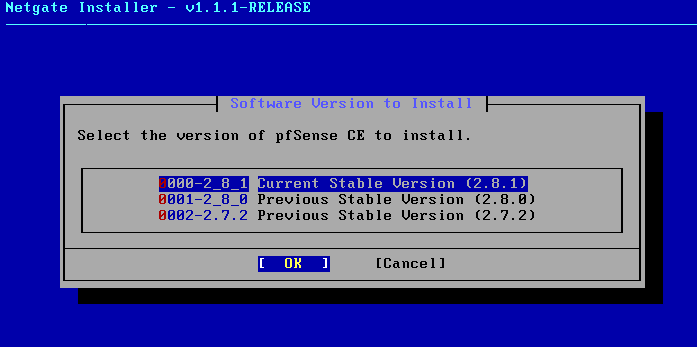
💡 The version number(s) listed may differ from what you see here, and that’s okay. Always choose the Current Stable Version listed and you can proceed.
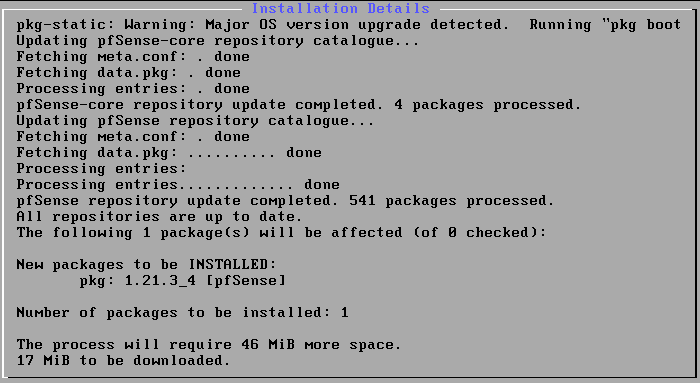
- The installation process takes 2-5 minutes as pfSense copies files, configures the base system, and sets up the ZFS pool.
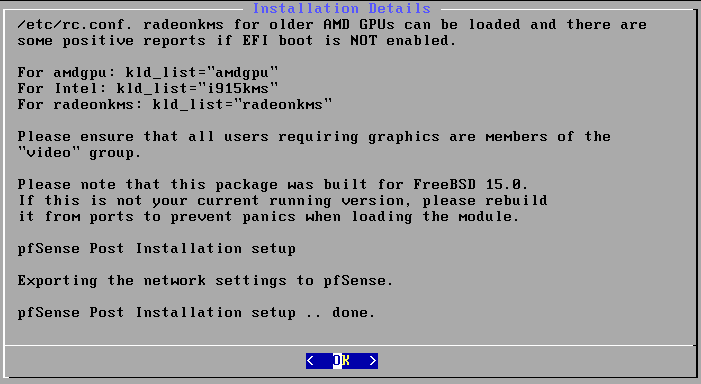
Click OK once the post-installation setup is complete.
💡 Good time to grab coffee or review the networking concepts coming up in Tutorial 4. You’ve earned it.
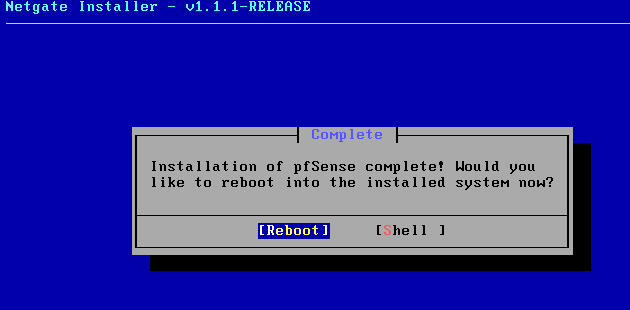
- When the reboot prompt appears, click Reboot or press Enter.
⚠️ Disconnect the ISO before the VM finishes rebooting. Go to VM > Removable Devices > CD/DVD > Disconnect. If you don’t, the installer will launch again on next boot and you’ll be staring at a very familiar screen wondering what went wrong.
Part 4: Confirming pfSense is Ready
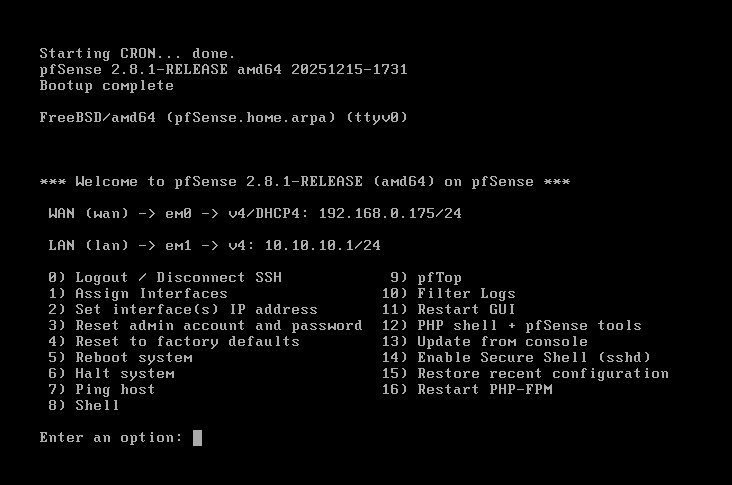
After reboot, pfSense boots to the console menu. Confirm your console shows:
- WAN (wan) → em0: with an IP address from your home network (assigned via DHCP)
- LAN (lan) → em1:
v4: 10.10.10.1/24 - The console menu with numbered options
💡 You may see an IPv6 address on WAN – that’s normal. If your home router supports IPv6, you’ll see a v6 address alongside the v4 address. It doesn’t affect anything in the lab. We’re working with IPv4 only.
If both WAN and LAN are showing the correct addresses, pfSense is installed and your network foundation is in place. The web interface is sitting at https://10.10.10.1, ready and waiting – but you’ll need Kali Linux on t LAN to reach it.
That’s exactly what we’re doing next.
Troubleshooting
pfSense not booting?
- Confirm the ISO is still attached and the VM boot order has CD/DVD first
- If you see a blank screen, press Enter
- Check that the VM has at least 1GB RAM allocated
Interfaces not detected during installation?
- Shut down the VM and verify all 6 network adapters are configured in VMware settings
- Confirm each adapter is assigned to the correct VMnet before powering back on
LAN showing 192.168.1.1 instead of 10.10.10.1?
- You likely clicked OK on the LAN Network Mode Setup screen (Part 3, step 5) without updating the default values
- From the console menu, select option 2 (Set interface(s) IP address), choose the LAN interface, and update the IP to
10.10.10.1/24with DHCP range10.10.10.100-200
WAN not getting an IP address?
- Confirm Network Adapter 1 is set to Bridged in VMware settings
- Check that Replicate physical network connection state is checked
- Verify your host machine has an active internet connection
Installer keeps launching after reboot?
- The ISO is still connected. Go to VM > Removable Devices > CD/DVD > Disconnect and reboot the VM
Tutorial Debrief
📖 Log Entry:
- 🗸 Downloaded pfSense CE from Netgate and verified the ISO
- 🗸 Created the pfSense VM in VMware with correct hardware settings
- 🗸 Configured all 6 network adapters with the correct VMnet assignments
- 🗸 Completed the Netgate Installer with WAN and LAN correctly assigned
- 🗸 Confirmed pfSense is running with WAN and LAN showing correct addresses
⚙️ Skills Stack:
- Downloading and verifying software from official sources
- Creating and configuring VMs in VMware Workstation
- Virtual network adapter configuration and VMnet assignment
- pfSense installation via the Netgate Installer
- Network interface assignment and IP address configuration
Next Objective
pfSense is up and your network foundation is in place. Next up is Lab Series #03: Install Kali Linux – the machine that will live on your LAN and give you access to the pfSense web interface, your attack tools, and everything else in the lab. Without it, pfSense is just sitting there waiting. Let’s give it something to talk to.
Resources
- pfSense Documentation: https://docs.netgate.com/pfsense/
- Netgate Forums: Active pfSense forum community
- r/pfSense: Reddit community
Questions, errors, weird behavior – comment below and we’ll debug it together.