
Overview
You’ve built the network, configured the firewall, and verified the isolation is working. Now it’s time to put something in the DMZ worth targeting. Metasploitable2 is a Linux virtual machine that was deliberately built to be vulnerable – not accidentally vulnerable, not poorly patched, but intentionally and embarrassingly vulnerable. It exists for exactly this purpose: giving you a legal, ethical, contained target to practice on.
This tutorial covers downloading, importing, and configuring Metasploitable2 in your DMZ1 segment, then running your first basic reconnaissance from Kali to confirm everything is working the way it should. By the end, you’ll have a target you can legally attack, a network that isolates it properly, and a workflow you’ll repeat for every other vulnerable VM you add to the lab.
What You’ll Learn:
- Downloading and importing Metasploitable2 into VMware
- Placing it correctly in the DMZ1 segment
- Basic Metasploitable2 orientation (what it is and isn’t)
- Running your first Nmap scan from Kali
- Verifying DMZ isolation is working as configured
Estimated Time: 20-30 minutes
Difficulty Level: Beginner-Intermediate
Prerequisites
Before You Begin:
- Tutorials 2 through 4 completed
- pfSense running with DMZ1 configured at 10.20.20.1/24
- Kali Linux installed and on the LAN (10.10.10.0/24)
- DMZ1 firewall rules in place (Block RFC1918 rule confirmed)
- At least 512MB RAM available (Metasploitable2 is extremely lightweight)
- At least 8GB free disk space
💻 Hardware check: Not sure if your machine is ready for this stage? See Hardware Check for full specs and what you can run at each point in the series.
⚠️ Read this before you proceed. Metasploitable2 is intentionally vulnerable. Do not connect it to a network with internet access outside of the controlled DMZ rules you’ve already configured. Do not change its default credentials. Do not update it. Do not patch it. The vulnerabilities are the point and fixing them defeats the entire purpose of having a practice target. The DMZ1 segment with the Block RFC1918 rule is where this machine belongs, and that’s exactly where it’s going.
Part 1: Downloading Metasploitable2
Metasploitable2 is distributed by Rapid7 (the company behind Metasploit) as a pre-built VMware image. It comes as a ready-to-run VM zip file so there’s no installer.
- Head to https://sourceforge.net/projects/metasploitable/ and click Download.

💡 SourceForge is legitimate here. If your instincts told you to be suspicious of a SourceForge download, those are good instincts to have – keep them. In this case it’s fine. Rapid7 has hosted Metasploitable2 there for years and it’s the official distribution point. The SHA256 checksum is listed on the page if you want to verify the download.
- The file downloads as a .zip archive – approximately 800MB. Once the download completes, extract it to
C:\Penumbra\VMs\.

💡 You’ll see C:\Penumbra\ referenced throughout this tutorial – that’s the lab folder name used in this series. If you named yours something different, substitute your folder name wherever you see Penumbra. The structure is what matters, not the name. After extraction you’ll have a folder containing several files, including Metasploitable.vmx, that’s the one VMware needs.
Part 2: Importing Metasploitable2 into VMware
This is even simpler than importing Kali. Metasploitable2 is a pre-built VM with no configuration wizard, no installation process, and no decisions to make beyond where to put it and which network it’s on.
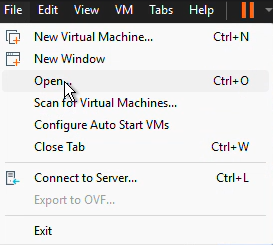
- Open VMware Workstation Pro.
- Go to File > Open.
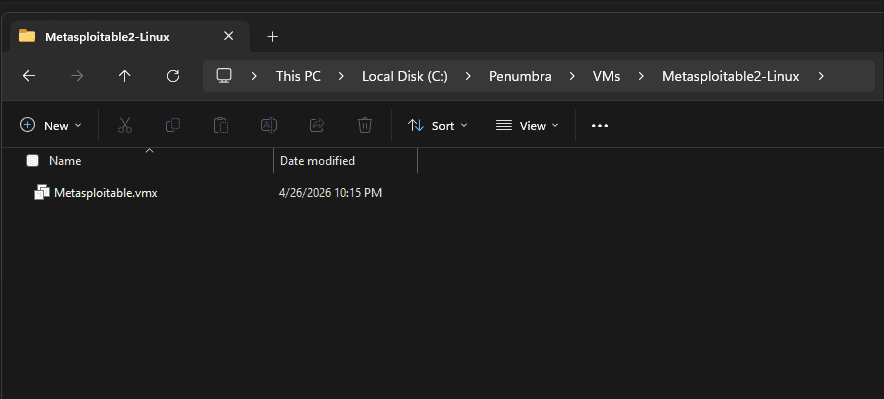
- Navigate to your extracted Metasploitable2 folder, select Metasploitable.vmx, and click Open.
- VMware may ask if you moved or copied this VM. Select I Copied It and click OK.
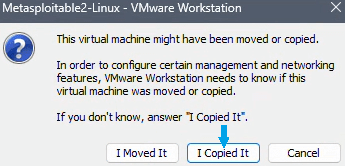
💡 Why “I Copied It”? VMware uses unique identifiers to track VMs. Selecting “I Copied It” generates a new identifier for this instance, which is the correct call when importing a downloaded image. If you don’t see this prompt at all, you’re on a fresh machine and VMware already knows it’s new. Just move on.
- Metasploitable2 will appear in your VMware library. Before powering it on, configure the hardware settings.
Part 3: Configuring Metasploitable2
Right-click the Metasploitable2 VM in your library and select Settings.

- Select Memory: set to 512 MB.
💡 512MB is genuinely sufficient here. Metasploitable2 is a minimal Linux install running ancient services. This is one of the few times in this series where “give it the minimum” is the right answer. Save your RAM budget for VMs that actually need it.
- Select Processors: 1 processor, 1 core is fine.
- Select Network Adapter: change to Custom: Specific virtual network → VMnet3. Confirm Connect at power on is checked while you’re here.
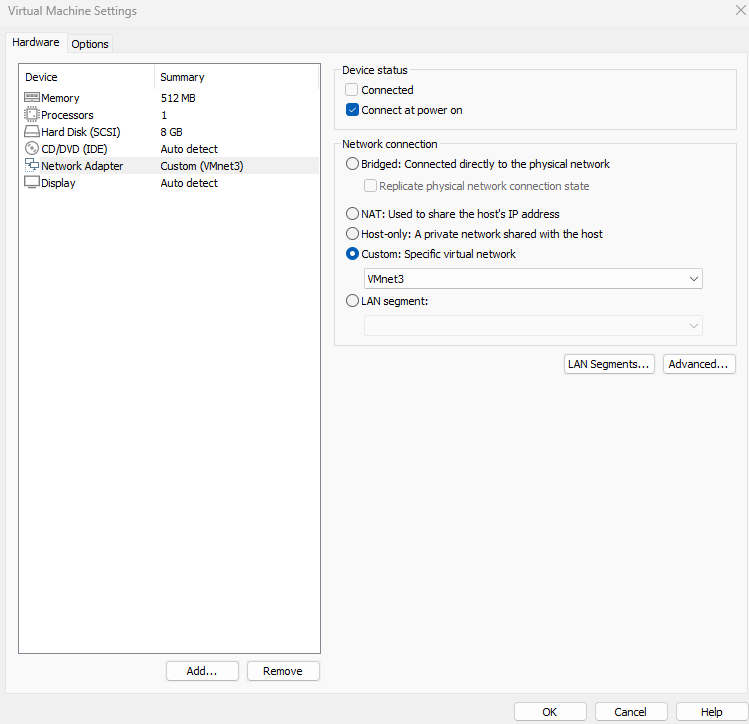
⚠️ VMnet3 is DMZ1, this is non-negotiable. Metasploitable2 must live in the DMZ, not on your LAN. Putting it on VMnet2 (LAN) with Kali would place your intentionally vulnerable machine on the same network as your management workstation with no firewall between them. The segmented architecture exists precisely so that Metasploitable2 lives behind a firewall that controls what can reach it and what it can reach. Don’t skip this.
- Remove hardware that Metasploitable2 doesn’t need:
- USB Controller: click Remove
- Sound Card: click Remove
- Printer: click Remove (if present)
- Click OK to save.
💡 No changes needed in the Options tab. The Options settings (Shared Folders, Guest Isolation, VMware Tools, VNC Connections, etc.) are all at appropriate defaults for a lab target VM. If you’re the type to click through every tab, it’s a good habit to keep. Click through and move on.
Part 4: First Boot and Orientation
Power on the Metasploitable2 VM.
💡 You may see a prompt asking about a virtual device (ide1:0) that can’t connect. This refers to a CD/DVD drive that’s referenced in the VM configuration but doesn’t exist on your host. Click No – Metasploitable2 doesn’t need it and you don’t want VMware trying to reconnect a nonexistent device every time the VM powers on.
💡 You may also see a VMware Tools installation prompt at the bottom of the screen. Click Never Remind Me. VMware Tools improves mouse integration, video performance, and shared folder support, none of which Metasploitable2 needs. It’s a text console target, not a workstation. Skip it.
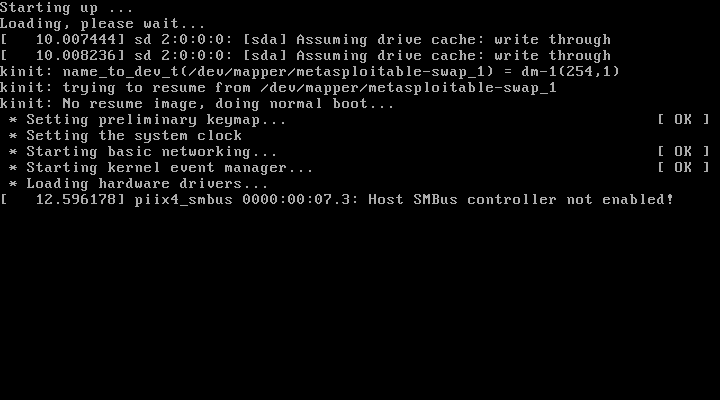
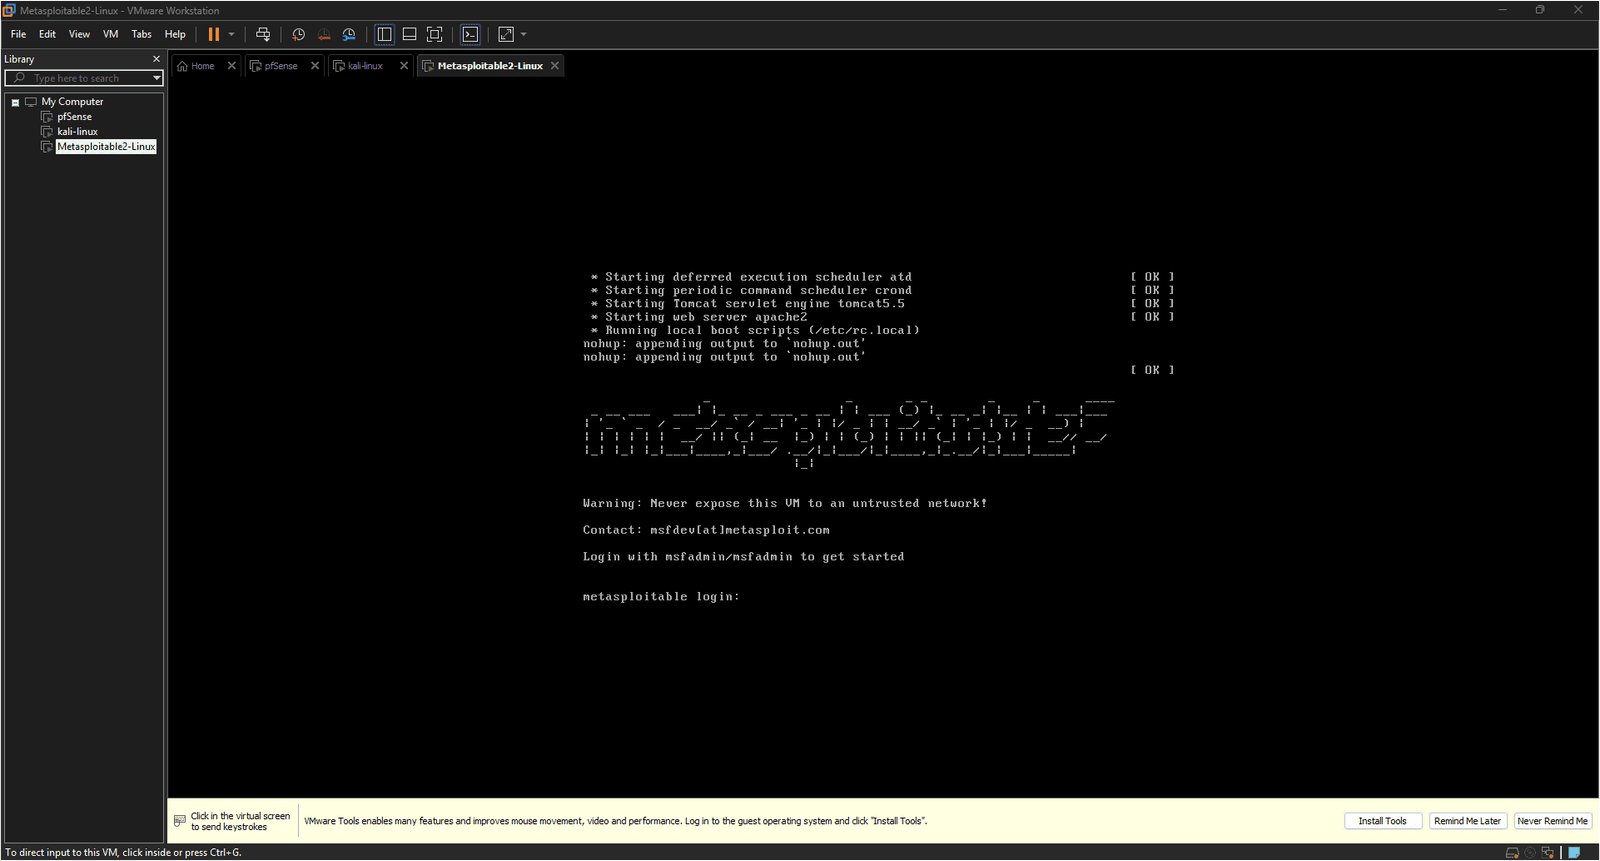
It boots quickly, no graphical interface, no boot menu choices, just a text console.
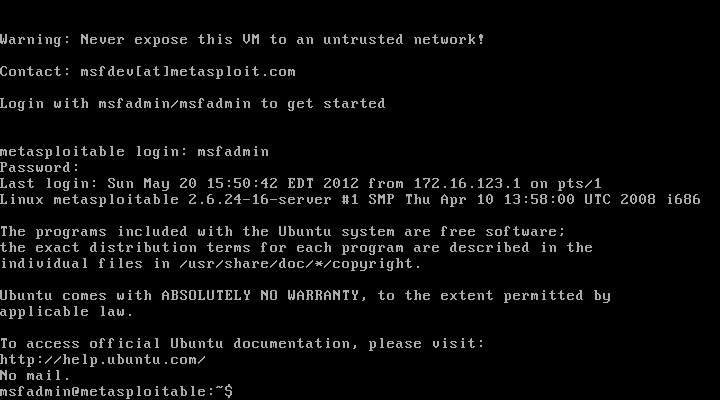
After booting you’ll see a login prompt and a banner that should immediately set the tone:
Warning: Never expose this VM to an untrusted network!
Noted, and moving on.
Default credentials:
- Username:
msfadmin - Password:
msfadmin
- Log in with the default credentials.
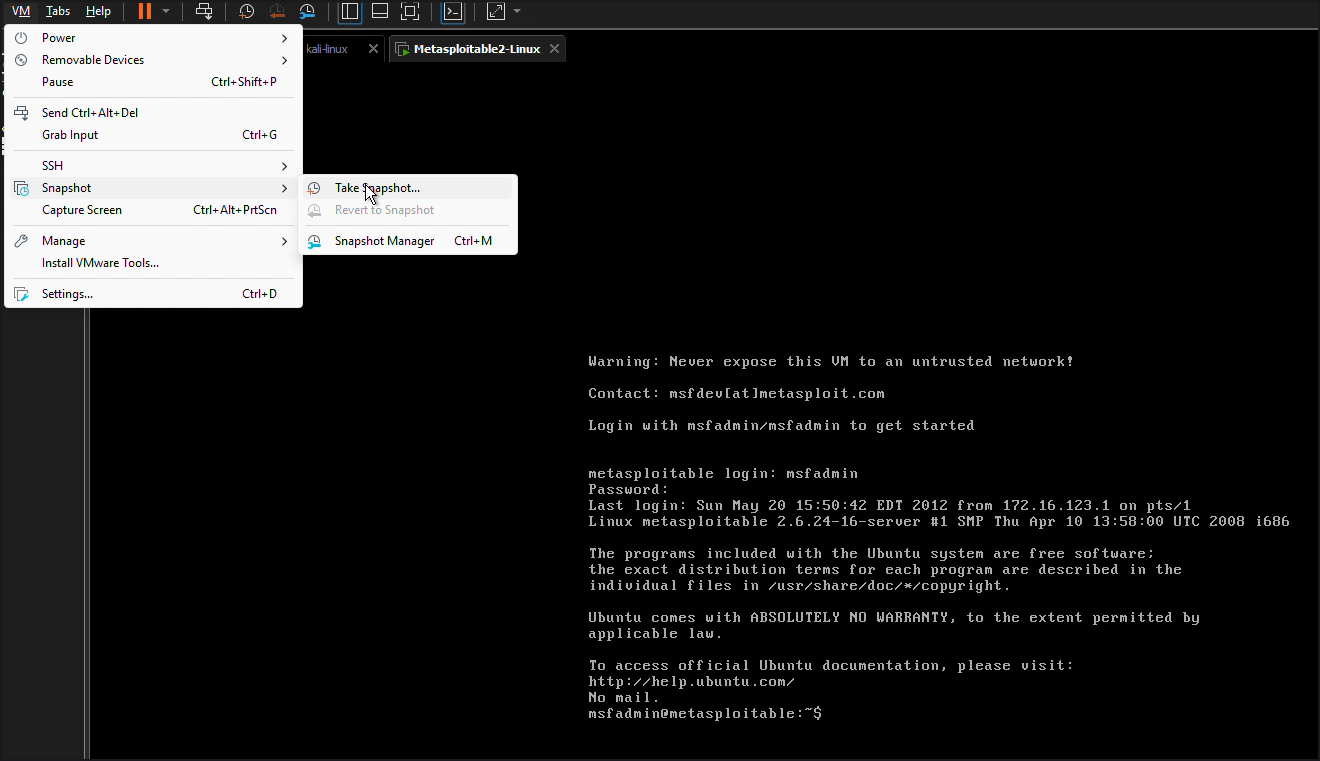
⚠️ Take a snapshot right now, before you do anything else. Metasploitable2 is going to get attacked repeatedly across multiple practice sessions: exploits run, services crashed, configurations altered. Without a clean snapshot, restoring a known-good state means reimporting the entire OVA and reconfiguring the VM from scratch. With a snapshot, it’s a two-click rollback.
In VMware, go to VM > Snapshot > Take Snapshot. Name it something like clean-first-login and click Take Snapshot. This becomes your permanent restore point for every practice session that follows.
⚠️ Do not change these credentials. Do not update the system. Do not patch anything. The default msfadmin/msfadmin credentials, the outdated services, the misconfigured applications, all of it is intentional. Changing or updating anything here defeats the purpose of having a practice target.
- Check the IP address Metasploitable2 received from pfSense:
ifconfig
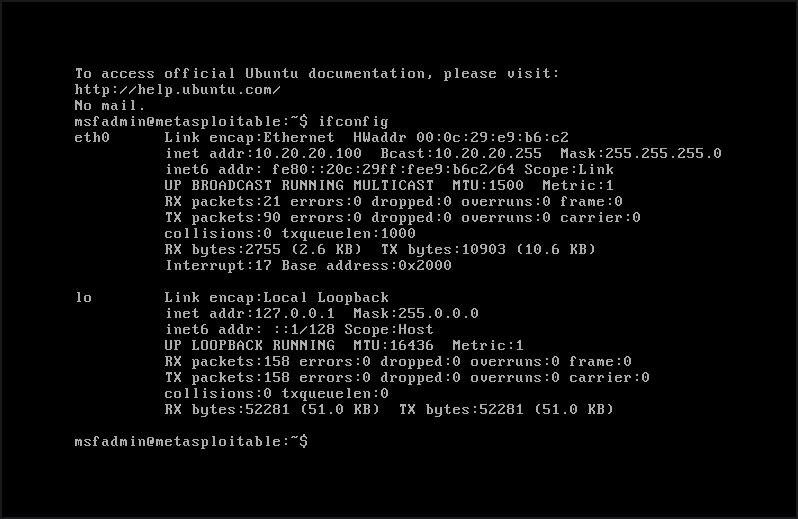
Look for an address in the 10.20.20.100-200 range on eth0. If you see one, pfSense’s DHCP server on DMZ1 handed it out and your VM is correctly placed in the segment.
💡 Write down this IP address. You’ll be targeting it from Kali in Part 6. The exact number between 100 and 200 doesn’t matter, just make a note of the address pfSense assigned.
- Check what’s listening on this machine:
netstat -tulnp
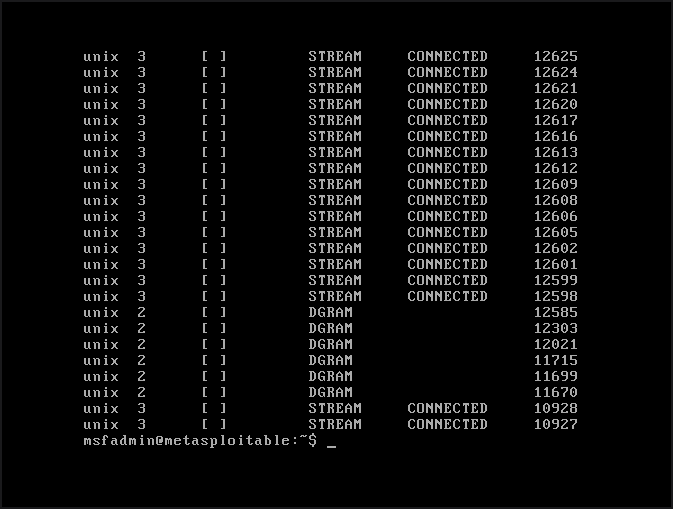
Take a moment to look at what comes back. You’ll see a lot of open ports: FTP, SSH, Telnet, HTTP, SMB, and more. Every one of those is a potential attack surface. This is what an intentionally vulnerable machine looks like from the inside. You’ll be looking at this same picture from the outside in a few minutes.
💡 What you’re looking at: Each line in the netstat output represents a service listening for connections. The port number tells you what service it is: port 21 is FTP, port 22 is SSH, port 23 is Telnet, port 80 is HTTP, port 445 is SMB. In a well-configured server most of these would be closed or firewalled. On Metasploitable2 they’re all open, all running vulnerable versions, and all waiting. This is intentional. You’re seeing your target from the inside before you scan it from the outside, that context is useful.
Part 5: Verifying DMZ Isolation
Before you start scanning Metasploitable2, confirm the isolation is working correctly. This is the most important step in this tutorial, verifying that your firewall rules are actually doing what you configured them to do.
💡 Run all three of these tests before moving on. It takes two minutes and confirms your lab is behaving correctly. Skipping verification here and discovering a misconfiguration three tutorials later is considerably more painful.
From the Metasploitable2 console:
- Try to reach your home network:
ping -c 3 192.168.1.1
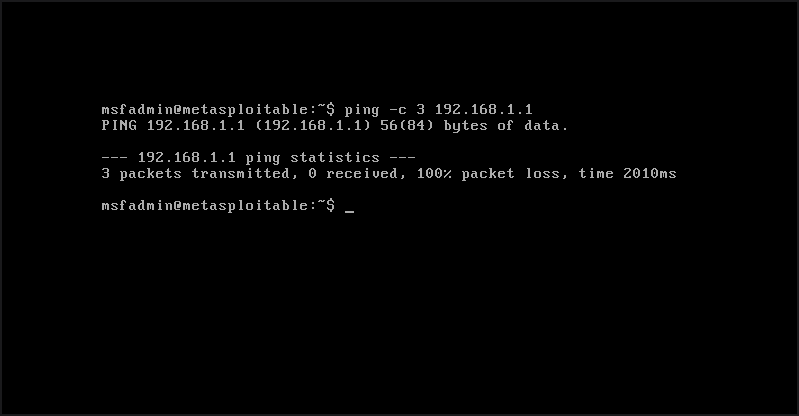
This should fail or time out. If it succeeds, your Block RFC1918 rule isn’t working. You’ll need to go back to Tutorial 4 and fix it before continuing.
- Try to reach the LAN segment:
ping -c 3 10.10.10.1
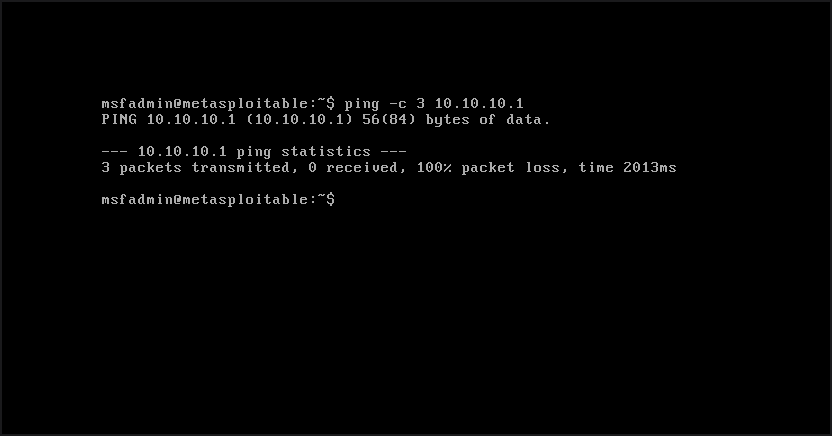
This should also fail. Metasploitable2 should not be able to reach your management network or Kali directly.
- Try to reach the internet:
curl -I http://google.com
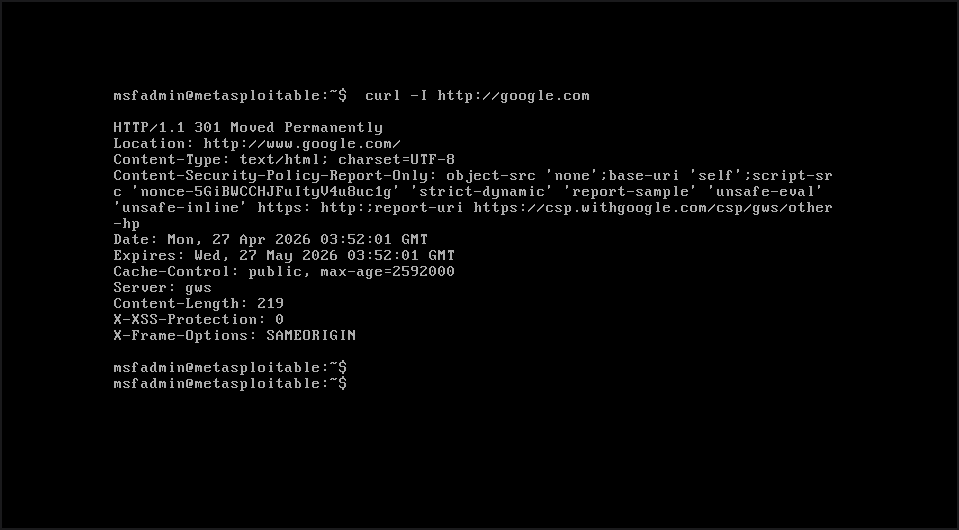
your DMZ1 rules allow internet access for HTTP/HTTPS traffic and this should return HTTP response headers. You’ll see a 301 Moved Permanently response, which is normal. Google redirects HTTP requests to HTTPS, so headers coming back at all is the confirmation you’re looking for. Use curl rather than ping to test internet connectivity from DMZ1. ICMP is not permitted by your DMZ1 rules, so ping will always fail from this segment regardless of whether internet access is working. That’s the firewall behaving correctly, not a problem.
⚠️ If isolation isn’t working: Head back to Firewall > Rules > DMZ1 in pfSense and verify your Block RFC1918 rule exists, references the RFC1918 alias, and sits below your Allow rules. Check the firewall logs at Status > System Logs > Firewall to see which rule is actually matching your traffic. Don’t proceed to scanning until isolation is confirmed.
Part 6: Your First Nmap Scan
Switch over to your Kali machine. This is where things get interesting.
Nmap (Network Mapper) is a tool for discovering hosts and services on a network. It’s one of the most fundamental tools in a security professional’s toolkit and it comes pre-installed on Kali. You’re going to use it to scan Metasploitable2 from across the firewall and see what’s visible from the LAN side.
💡 A word for complete Nmap beginners: Nmap sends packets to a target and analyzes the responses to determine what ports are open, what services are running, and sometimes what software versions those services are using. It’s not magic, just very systematic probing. What you’re about to do is legal, ethical, and contained entirely within your lab. This is exactly the kind of controlled environment where you’re supposed to learn this stuff.
Open a terminal on Kali. Replace 10.20.20.X with the actual IP address you noted from Metasploitable2’s ifconfig output.
- Start with a basic ping scan to confirm Kali can see Metasploitable2:
ping -c 4 10.20.20.X
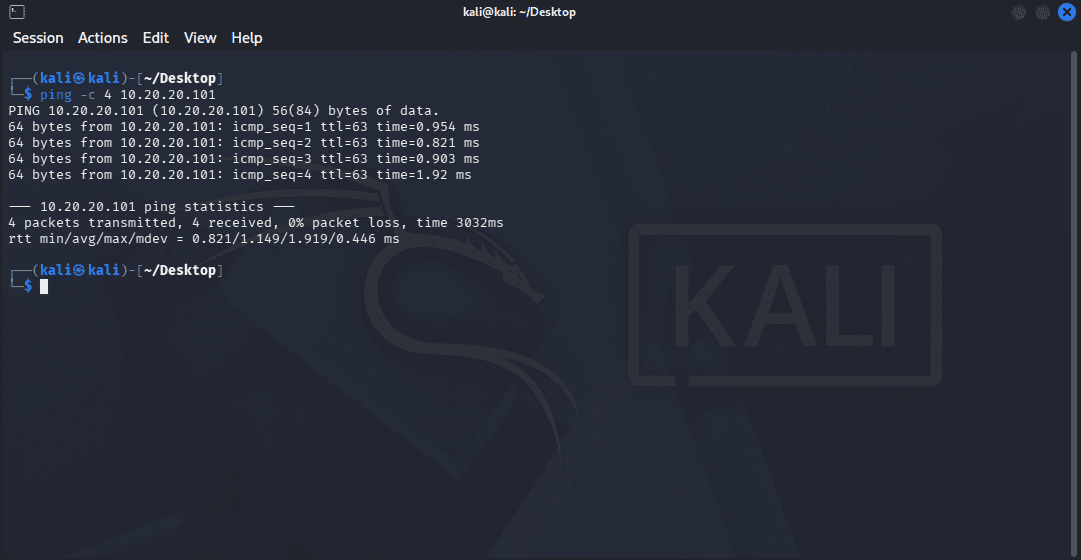
You should get replies. Kali is on the LAN, pfSense allows LAN traffic to reach DMZ1 interfaces, and the ping should succeed.
- Run a basic Nmap scan:
nmap 10.20.20.X

This runs a default TCP scan against the most common 1,000 ports. You’ll see a list of open ports and there will be a lot of them.
- Run a service version scan to see what’s actually running on each port:
nmap -sV 10.20.20.X
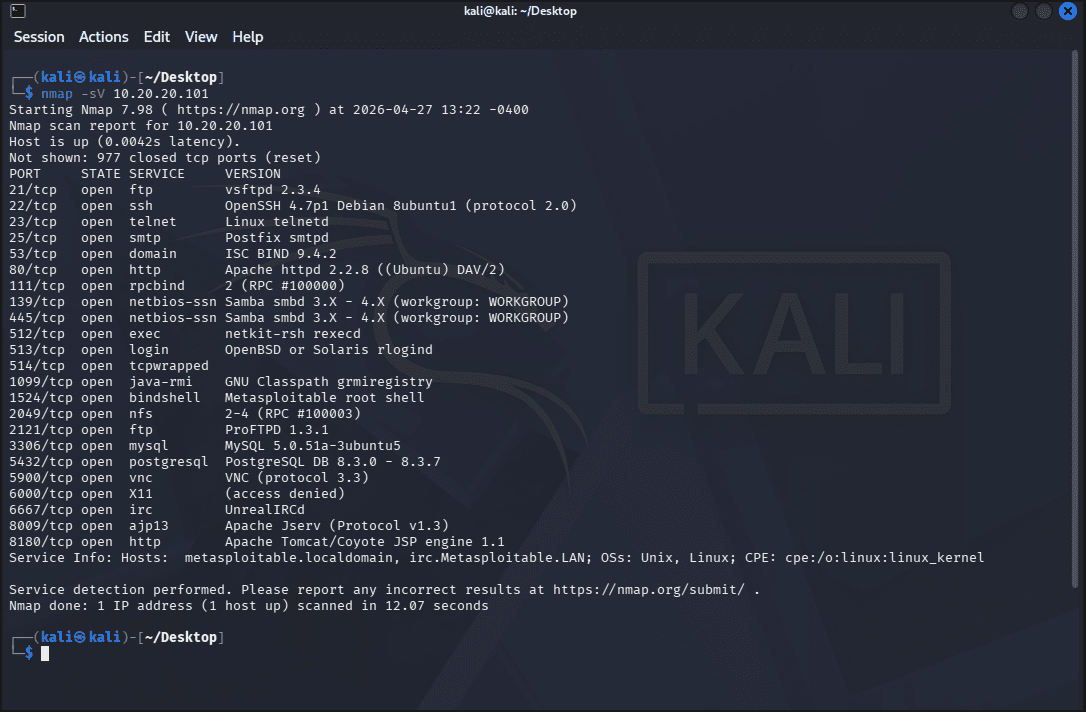
The -sV flag tells Nmap to probe each open port and identify the service and version running there. The output will show things like vsftpd 2.3.4, OpenSSH 4.7p1, and Apache httpd 2.2.8. All of these are outdated, have known vulnerabilities, and are exactly what you’d expect from a machine built to be vulnerable.
- Save the scan results for reference:
nmap -sV 10.20.20.X -oN ~/metasploitable2-initial-scan.txt
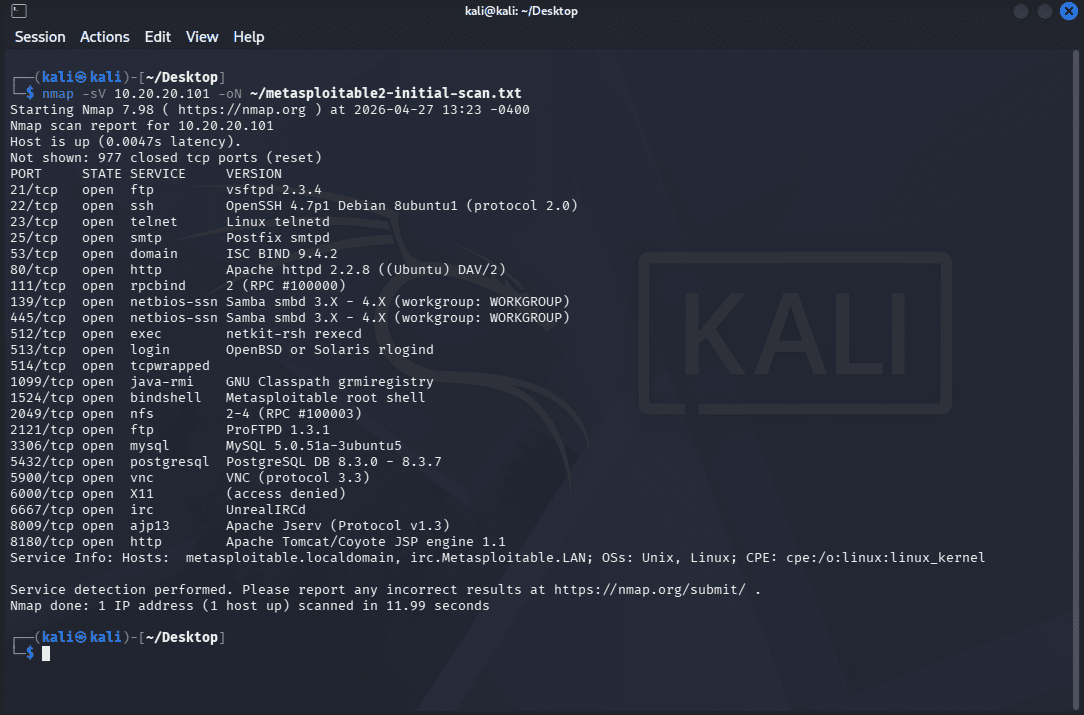
💡 Get in the habit of saving scan results. The -oN flag saves output in normal readable format to a file in your home directory. You’ll want to reference these results as you work through practice scenarios and having a timestamped baseline scan is useful when you want to compare what changed between sessions.
💡 What does all of this mean? Each open port with a vulnerable service version is a potential entry point. vsftpd 2.3.4 has a backdoor vulnerability. OpenSSH 4.7p1 is ancient. Apache 2.2.8 has multiple known CVEs. You’re not going to exploit any of these right now, but you’re looking at a real attack surface and learning to read what Nmap is telling you. That skill carries everywhere.
Troubleshooting
Metasploitable2 not getting a DHCP address?
- Confirm pfSense is powered on and DMZ1 DHCP is enabled (Services > DHCP Server > DMZ1)
- Verify the VM’s network adapter is set to Custom: VMnet3 in VMware settings
- From the Metasploitable2 console, try
sudo dhclient eth0to request an IP manually - Check current DHCP leases at Status > DHCP Leases in pfSense
Metasploitable2 can reach the LAN or home network?
- Your Block RFC1918 firewall rule isn’t working correctly
- Go to Firewall > Rules > DMZ1 and verify the rule exists and references the RFC1918 alias
- Check rule order: Block RFC1918 must sit below your Allow rules
- Check the firewall logs to see which rule is actually matching the traffic
Kali can’t reach Metasploitable2?
- Confirm both VMs are powered on
- Verify Kali is on VMnet2 (LAN) and Metasploitable2 is on VMnet3 (DMZ1)
- Ping the pfSense DMZ1 interface from Kali first (
ping 10.20.20.1). If the ping fails, the issue is between Kali and pfSense, not between Kali and Metasploitable2 - Confirm that no LAN firewall rules are blocking traffic to the DMZ
Nmap scan shows no open ports?
- Make sure you’re scanning the correct IP address
- Try a host discovery scan first:
nmap -sn 10.20.20.Xto confirm the host is up before scanning ports - Metasploitable2 may not have finished booting – give it another minute and try again
Tutorial Debrief
📖 Log Entry:
- 🗸 Downloaded and imported Metasploitable2 into VMware
- 🗸 Placed Metasploitable2 correctly in the DMZ1 segment (VMnet3)
- 🗸 Verified DMZ isolation – Metasploitable2 can’t reach the LAN or home network
- 🗸 Confirmed internet access from DMZ1 is working as configured
- 🗸 Ran your first Nmap scan and identified open ports and service versions
⚙️ Skills Stack:
- Importing and configuring pre-built vulnerable VMs
- Network placement and segmentation verification
- Firewall rule testing and validation
- Basic Nmap scanning and output interpretation
- Scan result documentation
Next Objective
Metasploitable2 is now sitting in your DMZ with open ports and known vulnerabilities across every service. You’ve confirmed the isolation is working. You’ve seen the attack surface from both sides: the open ports from inside the machine and the services visible from your Kali scans.
What you haven’t done yet is exploit any of it, and that’s intentional at this phase of the lab setup. The tutorials in this series are focused on building the lab correctly – and exploitation is a practice scenario, not a lab setup step. Once the full environment is in place, this is when the practice scenarios start – using the whole lab as an integrated environment rather than just poking at one machine in isolation.
Next up: the CORP segment gets a Windows Active Directory domain, and after that Security Onion goes on the SPAN interface – at which point the full lab is in place and the practice scenarios begin.
Resources
- Metasploitable2 Documentation: https://docs.rapid7.com/metasploit/metasploitable-2/
- Nmap Reference: https://nmap.org/book/man.html
- Kali Linux Tools – Nmap: https://www.kali.org/tools/nmap/
- r/netsec: Reddit community for network security discussion
Questions, errors, weird behavior – comment below and we’ll debug it together.